Arduino has become the default starting point for anyone learning hardware programming. Whether you want to build a home automation system, prototype a wearable device, or simply understand how software controls physical components, Arduino gives you an accessible way in.
But getting started with Arduino programming can feel overwhelming. Which board do you pick? What language does it use? How do you go from a blank screen to a blinking LED?
This guide walks you through everything you need to begin. You will learn what Arduino is, what programming language it uses, how to set up your development environment, and how to write, upload, and debug your first programs. By the end, you will have built two working projects and understand the core concepts well enough to tackle more complex ones on your own.
No prior hardware experience is required. If you can write a few lines of code (or want to learn), you are ready.
What Is Arduino?
Arduino is an open-source electronics platform that combines simple hardware with easy-to-use software. At its core, an Arduino board is a small microcontroller that reads inputs (a sensor detecting light, a button press, a temperature reading) and turns them into outputs (turning on an LED, spinning a motor, displaying data on a screen).
The most popular board for beginners is the Arduino Uno R3. It has 14 digital input/output pins, 6 analog inputs, a USB connection for programming, and a power jack. It is affordable, well-documented, and compatible with thousands of tutorials and accessories.
Other boards worth knowing about include:
- Arduino Nano: smaller form factor, ideal for compact projects
- Arduino Mega: more pins and memory for complex builds
- Arduino Nano 33 IoT: built-in Wi-Fi and Bluetooth for connected projects
- Arduino Uno R4: the newest generation with improved processing power
For this guide, all examples use the Arduino Uno, but the programming concepts apply to every Arduino board.
What Programming Language Does Arduino Use?
Arduino programming uses a language based on C/C++. If you have written C or C++ code before, Arduino syntax will feel familiar. If you are new to programming entirely, the learning curve is gentle because Arduino simplifies many of the complex parts of C/C++.
Arduino programs are called sketches. You write sketches using a simplified set of functions and libraries that abstract away low-level hardware interactions. For example, instead of writing raw register commands to control a pin, you call digitalWrite(13, HIGH).
The key distinction: Arduino is not a completely separate programming language. It is C/C++ with a set of built-in functions and libraries designed specifically for microcontroller hardware. This means any valid C or C++ code works in an Arduino sketch, and the skills you build here transfer directly to other embedded programming contexts.
For developers who prefer Python, MicroPython and CircuitPython offer alternatives on compatible boards, though the Arduino ecosystem remains the most widely supported.
Setting Up the Arduino IDE
The Arduino IDE (Integrated Development Environment) is where you write, compile, and upload sketches to your board.
Download and Install
- Visit the official Arduino software page.
- Download Arduino IDE 2.x for your operating system (Windows, macOS, or Linux).
- Run the installer and follow the on-screen prompts.
Arduino IDE 2.x is a significant upgrade over the legacy 1.8.x version. It includes an auto-complete code editor, an integrated serial monitor, a built-in debugger, and a streamlined library manager. If older tutorials reference IDE 1.8.x, the same core functionality exists in 2.x with a more modern interface.
Connect Your Board
- Plug your Arduino Uno into your computer using a USB cable.
- In the IDE, go to Tools > Board and select Arduino Uno.
- Go to Tools > Port and select the COM port that shows your board.
If your board does not appear, check that the USB cable supports data transfer (some cables are power-only) and that the correct drivers are installed.
Understanding Arduino Programming Structure
Every Arduino sketch has two required functions: setup() and loop(). This structure is the foundation of all Arduino programming.
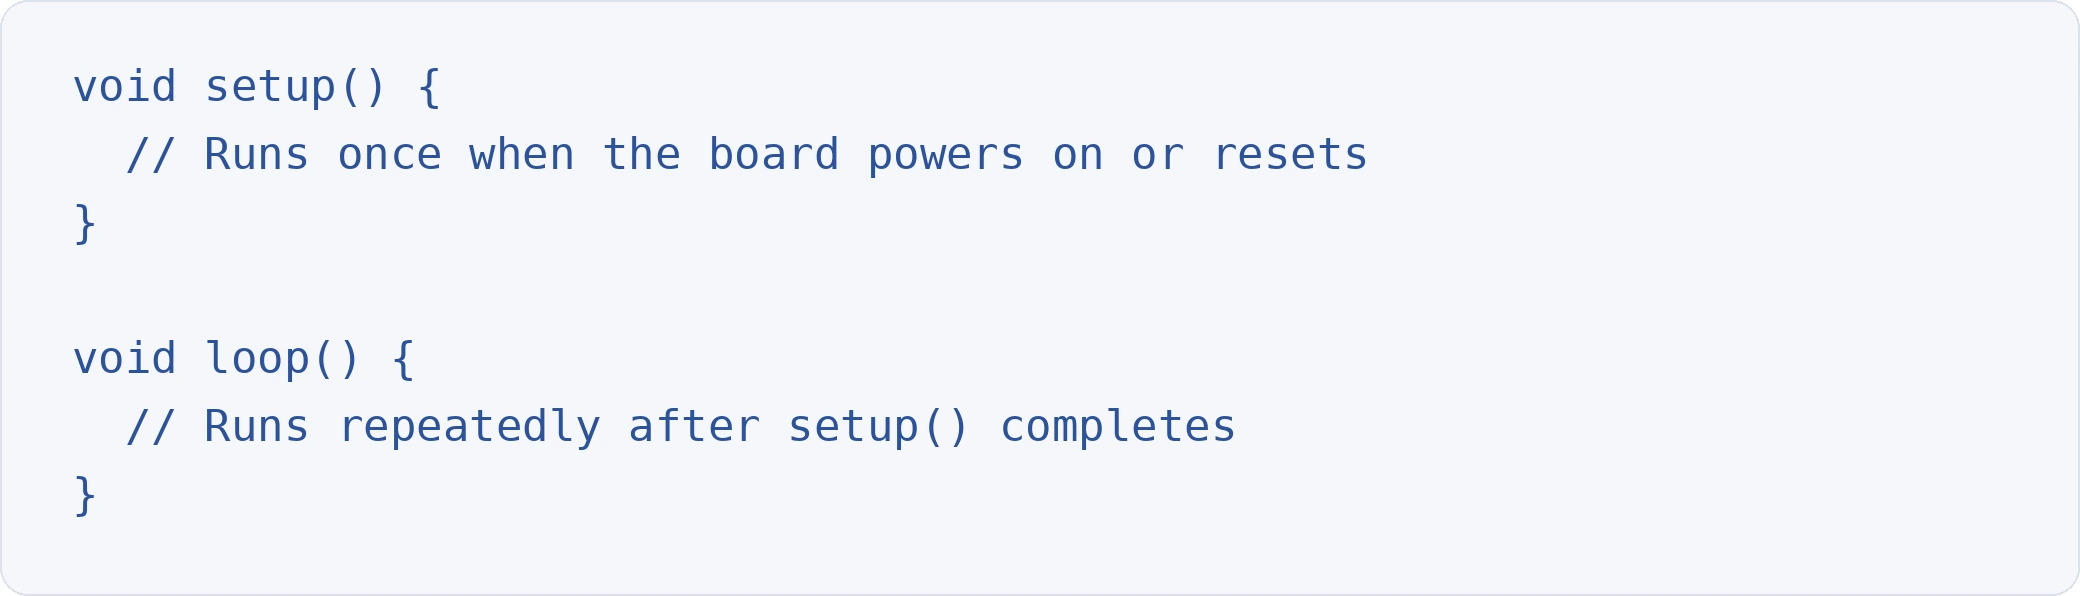
The setup() Function
setup() executes once when the program starts. Use it to initialise pin modes, start serial communication, and configure libraries.

The loop() Function
loop() runs continuously after setup() finishes. This is where your main program logic lives. The function repeats from top to bottom indefinitely until the board loses power or is reset.
Important: Arduino measures time in milliseconds. delay(1000) pauses execution for one second.
Arduino Programming Language Basics
Before building projects, you need to understand the core syntax. Here are the essentials.
Variables and Data Types
Variables store values that your program uses. Common data types include:
- int: whole numbers (-32,768 to 32,767)
- long: larger whole numbers
- float: decimal numbers (e.g., 3.14)
- boolean: true or false
- char: a single character
- String: text (e.g., "Hello")

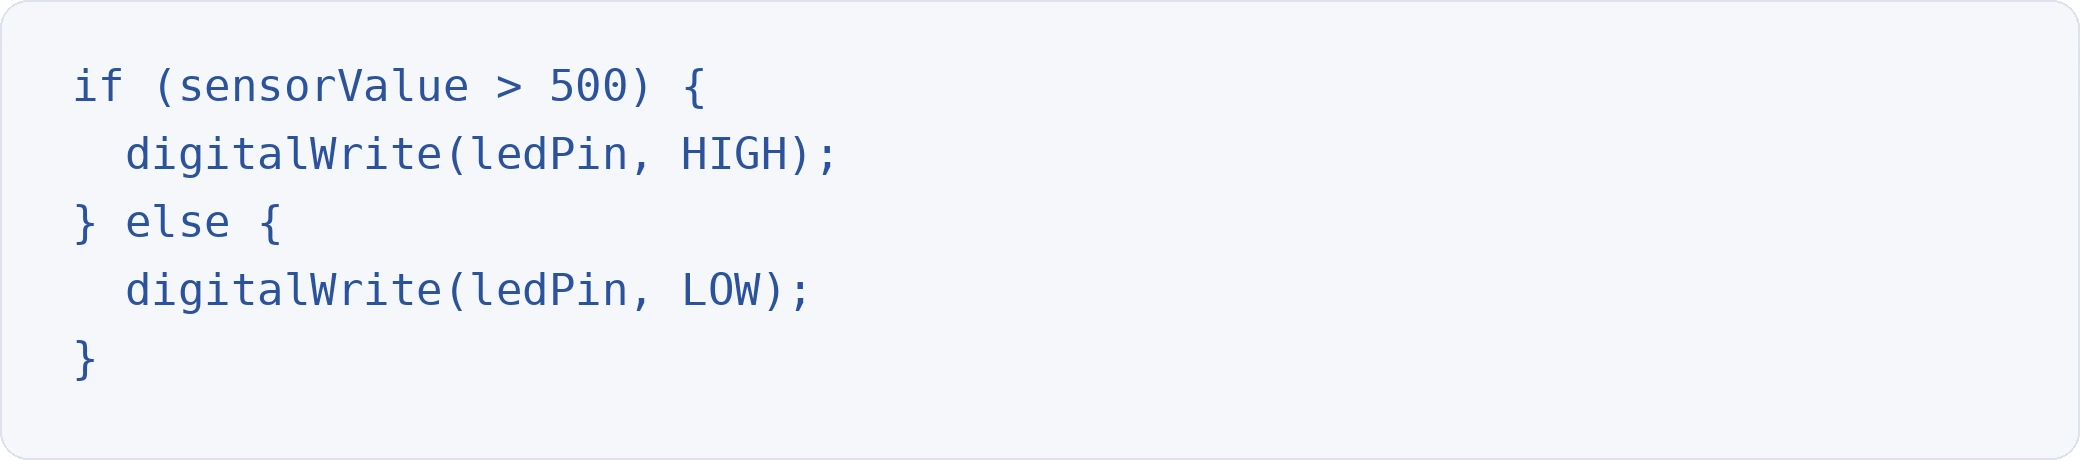
Control Flow
Control flow statements let your program make decisions and repeat actions.
If/else statements:
For loops:

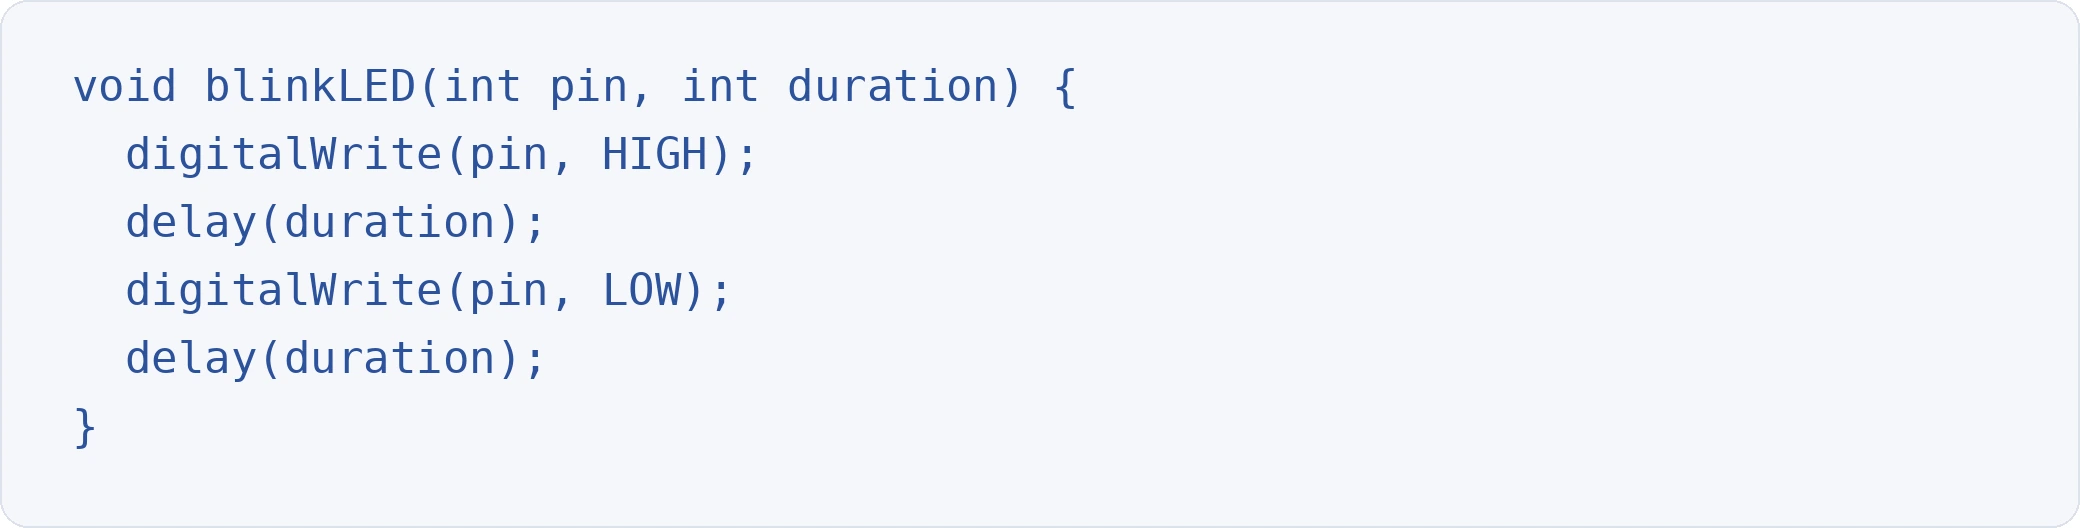
Functions
Custom functions help you organise code into reusable blocks.
Mastering these fundamentals in C/C++ builds a strong foundation. The same concepts appear in coding interview questions across software engineering roles.
Your First Arduino Programming Project: Blinking an LED
The "Hello World" of Arduino programming is blinking an LED. It confirms your hardware, software, and connections all work.
Components Required
- Arduino Uno R3
- Breadboard
- 3 jumper wires
- 1 LED
- 1x 220Ω or 1KΩ resistor
Circuit Setup
- Connect digital pin 13 to the positive rail of the breadboard.
- Connect GND to the negative rail.
- Place the resistor between the positive rail and a terminal strip.
- Insert the LED below the resistor (long leg towards the resistor, short leg towards the negative rail).
- Connect the LED's short leg (cathode) to the negative rail.
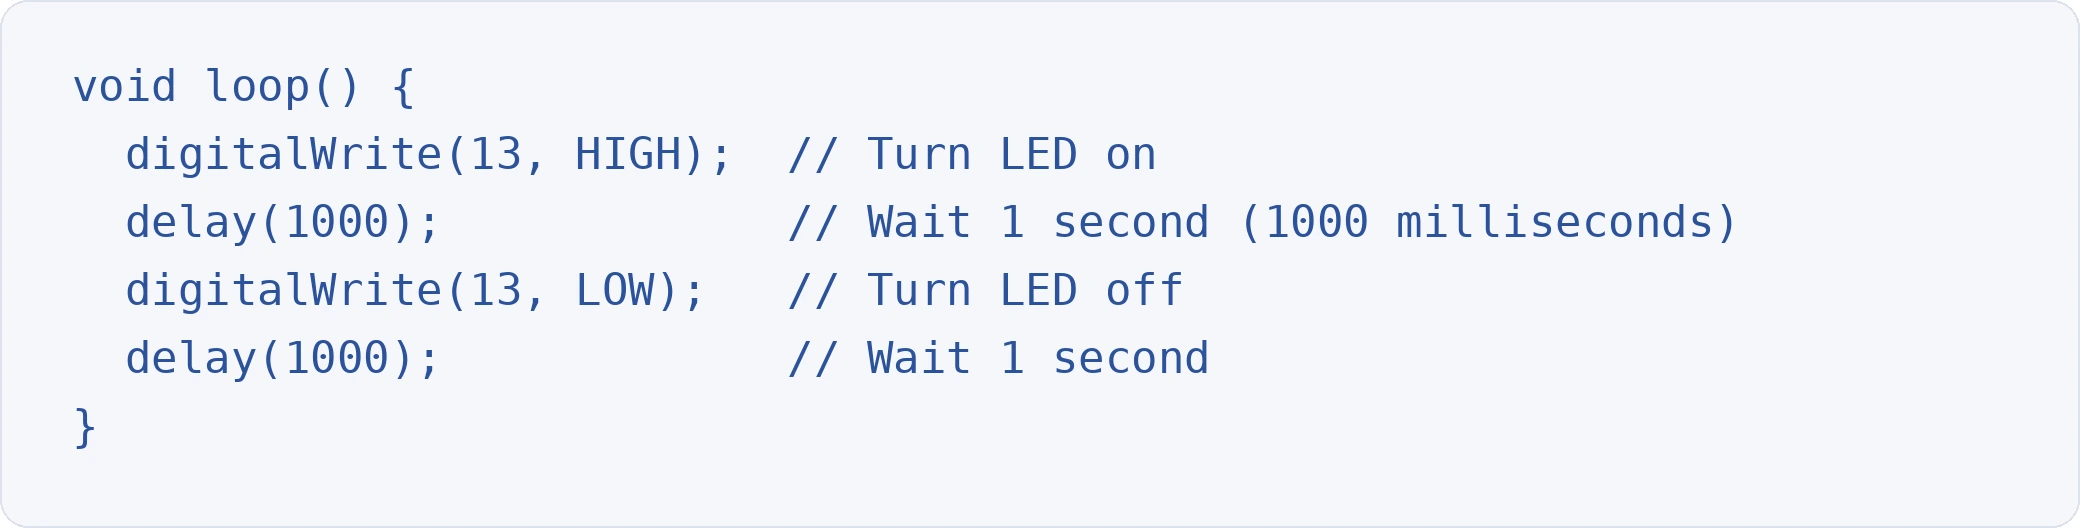
Code
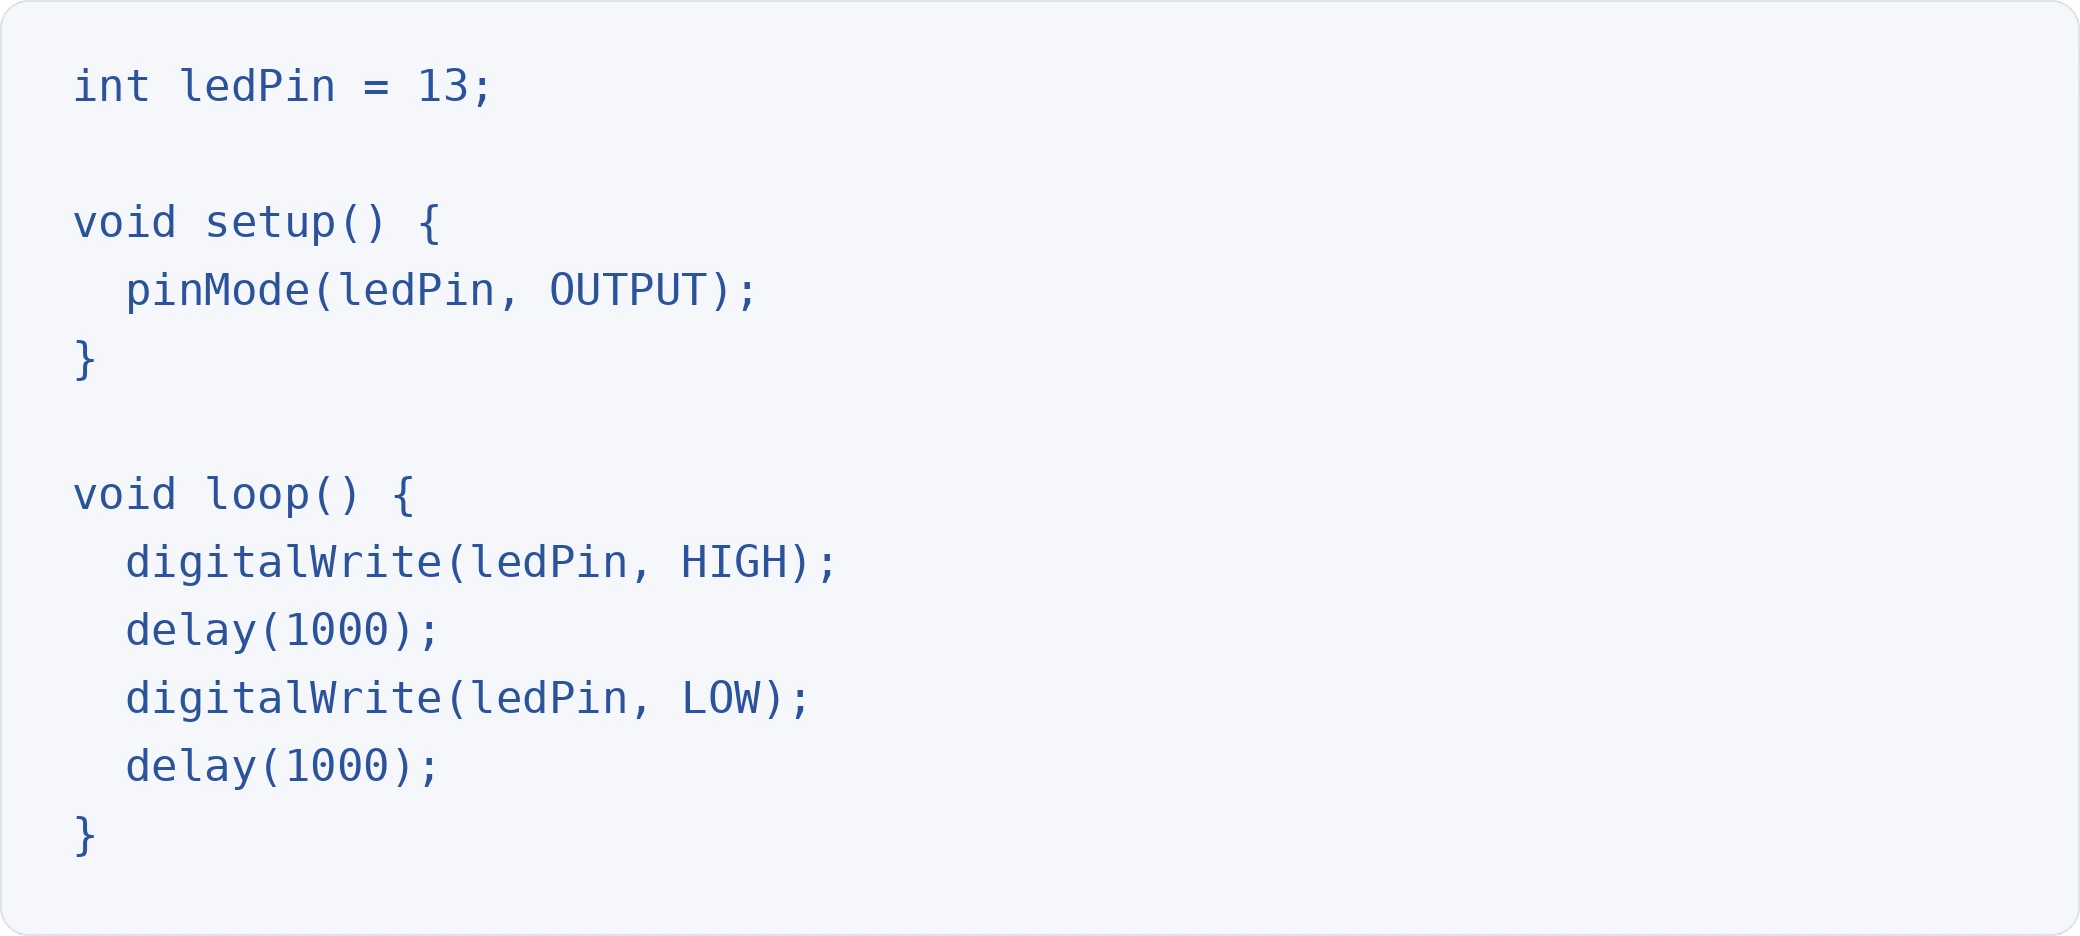
Upload the sketch by clicking the arrow button in the IDE. Your LED should blink on and off at one-second intervals. If nothing happens, check your wiring, confirm the correct board and port are selected, and verify the LED polarity.
Analog Output with PWM: Fading an LED
Digital pins output either HIGH (5V) or LOW (0V). To create smooth brightness transitions, you need Pulse Width Modulation (PWM). PWM rapidly switches a pin on and off to simulate voltage levels between 0V and 5V.
On the Arduino Uno, pins marked with a tilde (~) support PWM: pins 3, 5, 6, 9, 10, and 11.
Circuit Adjustment
Use the same circuit as the blink project, but connect to pin 9 instead of pin 13.
Code
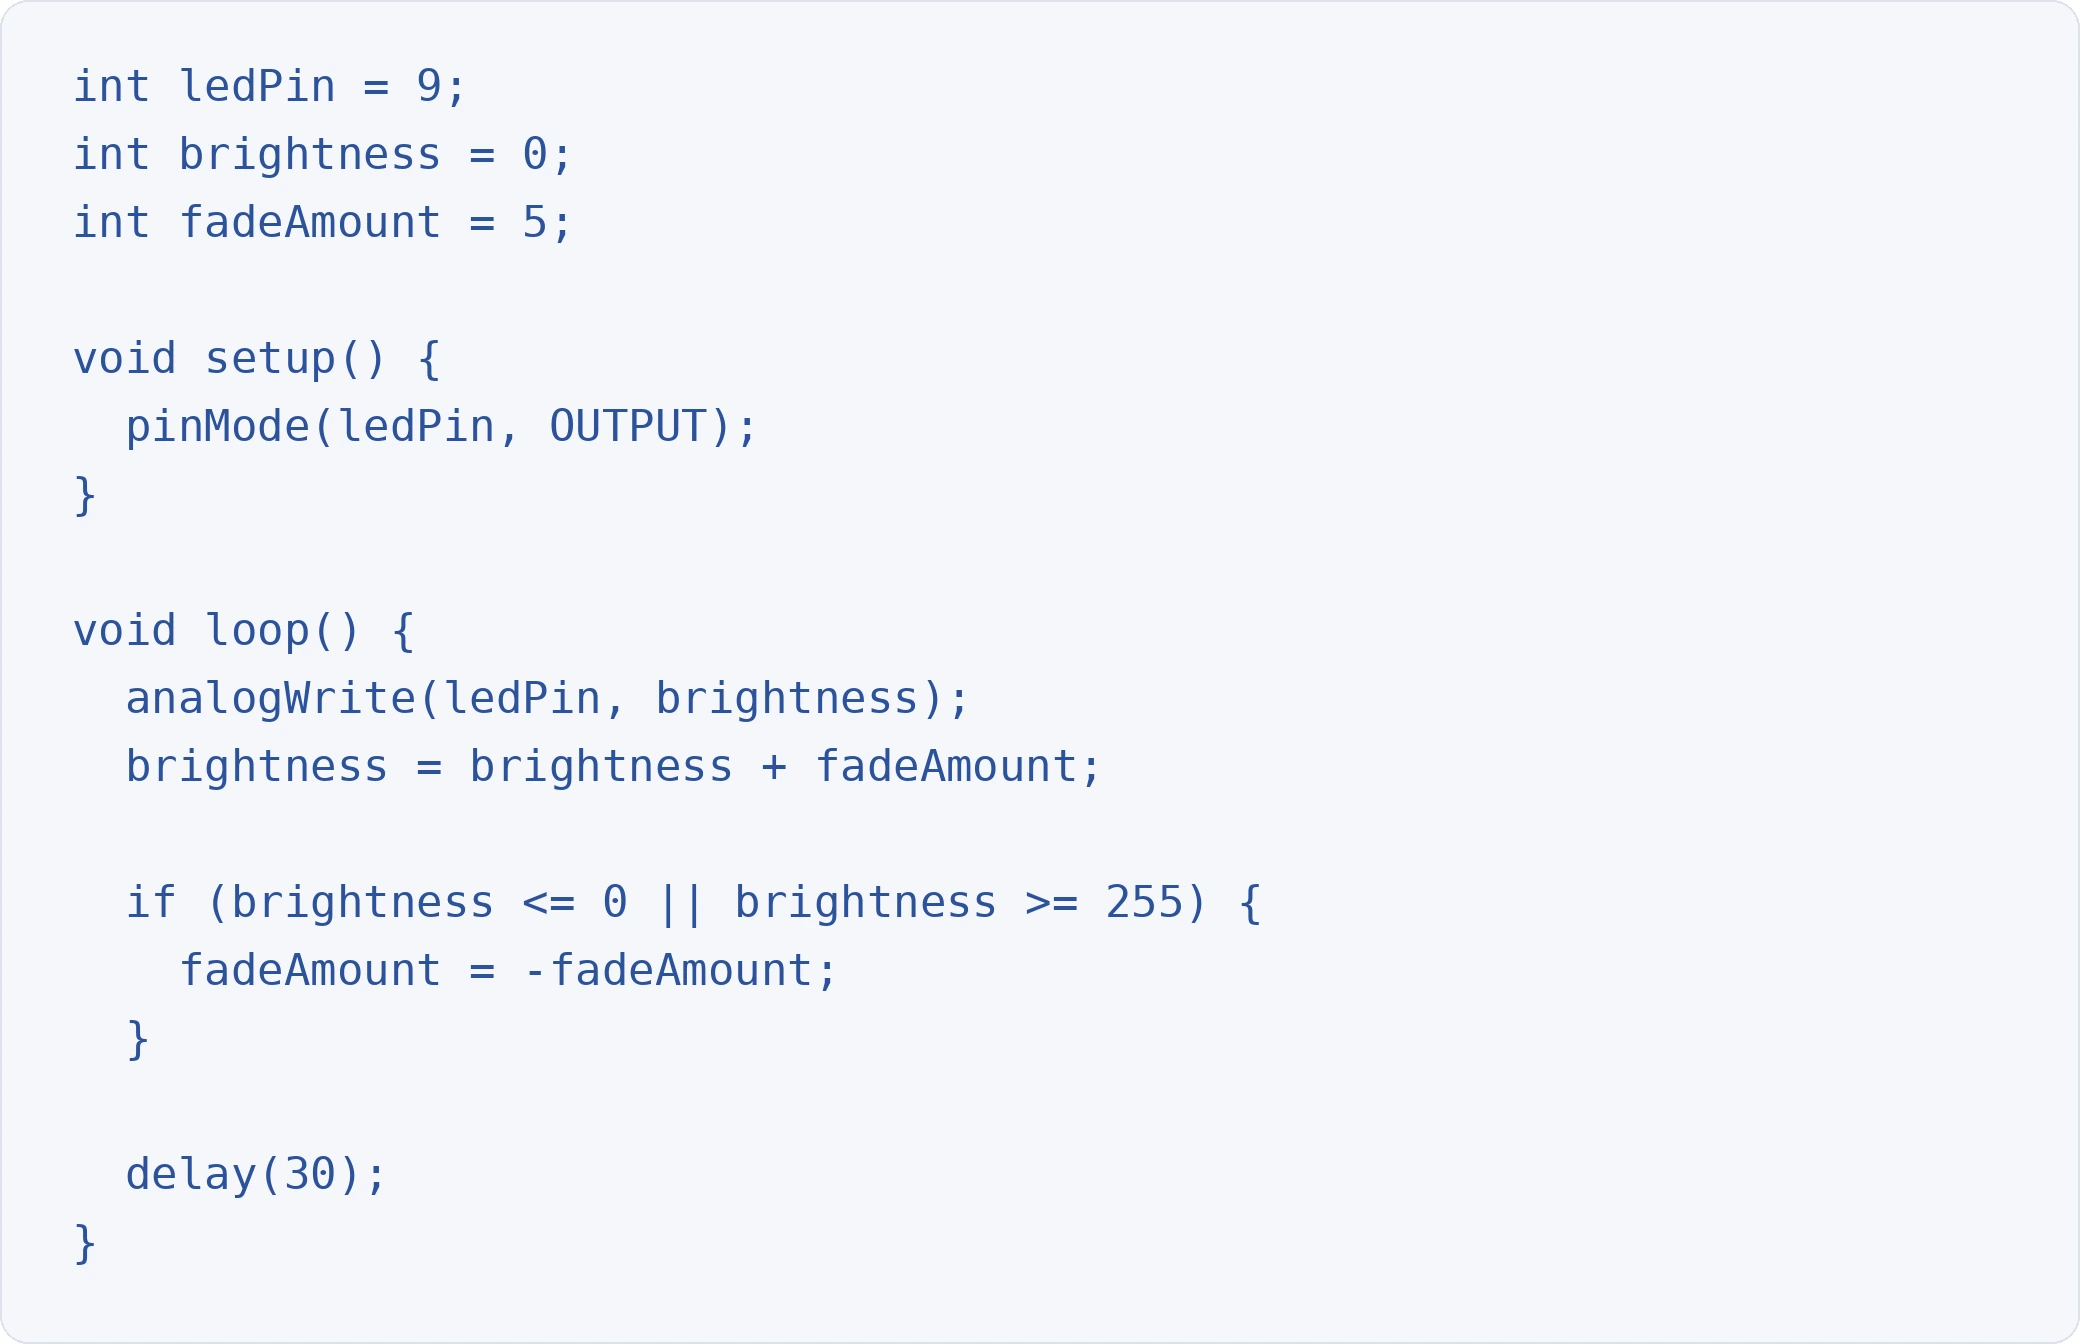
analogWrite() accepts values from 0 (fully off) to 255 (fully bright). The sketch gradually increases brightness, reverses direction at the limits, and creates a smooth fade-in, fade-out effect.
Serial Communication and Debugging
The Serial Monitor is your most valuable debugging tool. It lets you send data from the Arduino to your computer (and vice versa) over the USB connection.
Basic Serial Output
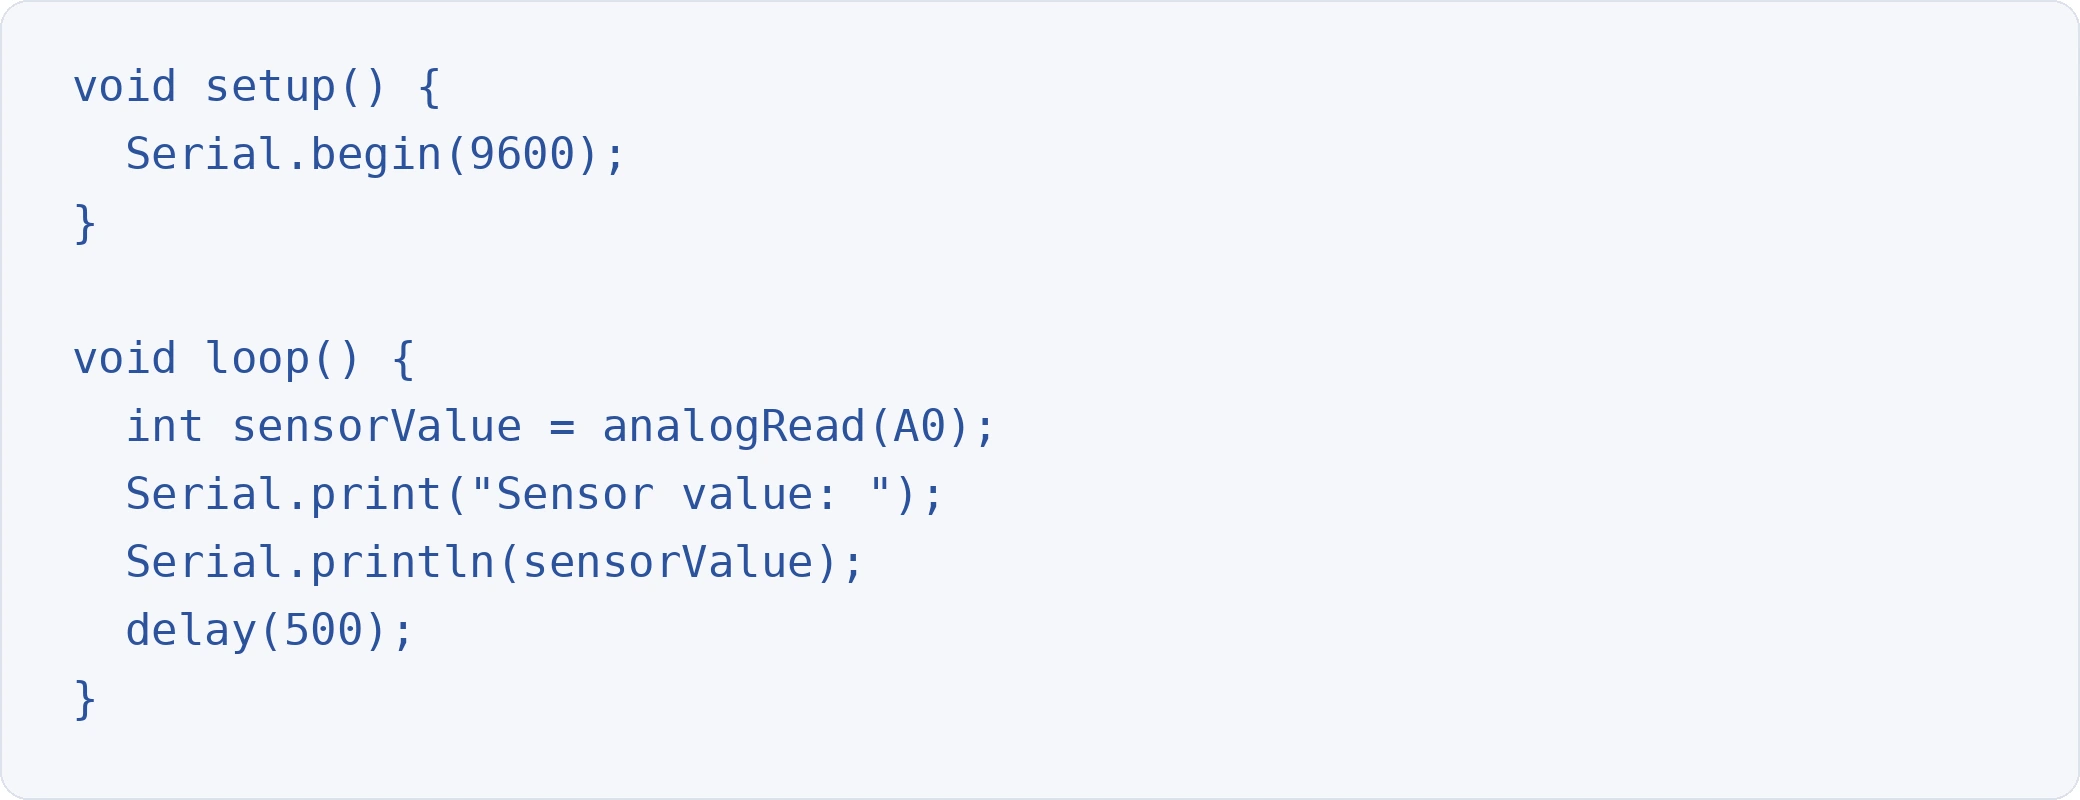
Open the Serial Monitor in the IDE (Tools > Serial Monitor or Ctrl+Shift+M) to see live output. This is essential for reading sensor data, tracking variable values, and diagnosing unexpected behaviour.
Reading Analog Input
The Arduino Uno has 6 analog input pins (A0 through A5). analogRead() returns a value from 0 to 1023, corresponding to 0V to 5V. Connect a potentiometer or light sensor to A0 and use the code above to see real-time values in the Serial Monitor.
Using Arduino Libraries
Libraries extend Arduino's functionality without requiring you to write everything from scratch. They provide pre-built code for sensors, displays, communication protocols, and more.
Installing Libraries
- In the IDE, go to Sketch > Include Library > Manage Libraries.
- Search for the library you need (e.g., "DHT sensor library" for temperature sensors).
- Click Install.
Commonly Used Libraries
- Servo: control servo motors
- LiquidCrystal: drive LCD displays
- DHT: read temperature and humidity sensors
- Wire: I2C communication
- WiFiNINA: Wi-Fi connectivity for IoT boards
Include a library at the top of your sketch with #include <LibraryName.h>.
Common Mistakes and Troubleshooting
Every beginner hits the same roadblocks. Here are the most frequent issues and how to fix them.
- "Board not found" error: Check that your USB cable supports data. Try a different cable or USB port. Reinstall board drivers if needed.
- Upload fails: Confirm the correct board and port are selected under Tools. Close any other software using the serial port.
- LED does not light up: Verify LED polarity (long leg is positive). Check resistor connections. Test with a different LED.
- Code compiles but nothing happens: Add Serial.println() statements to trace execution. Check pin numbers in code match physical wiring.
- Sketch behaves unpredictably: Floating input pins read random noise. Use INPUT_PULLUP mode or add external pull-down resistors.
Moving Beyond delay()
The delay() function pauses your entire program. For simple projects, this is fine. For anything involving multiple inputs or real-time responses, delay() creates problems because the board cannot do anything else while waiting.
The solution is millis(), which returns the number of milliseconds since the program started. Use it to check elapsed time without blocking execution:
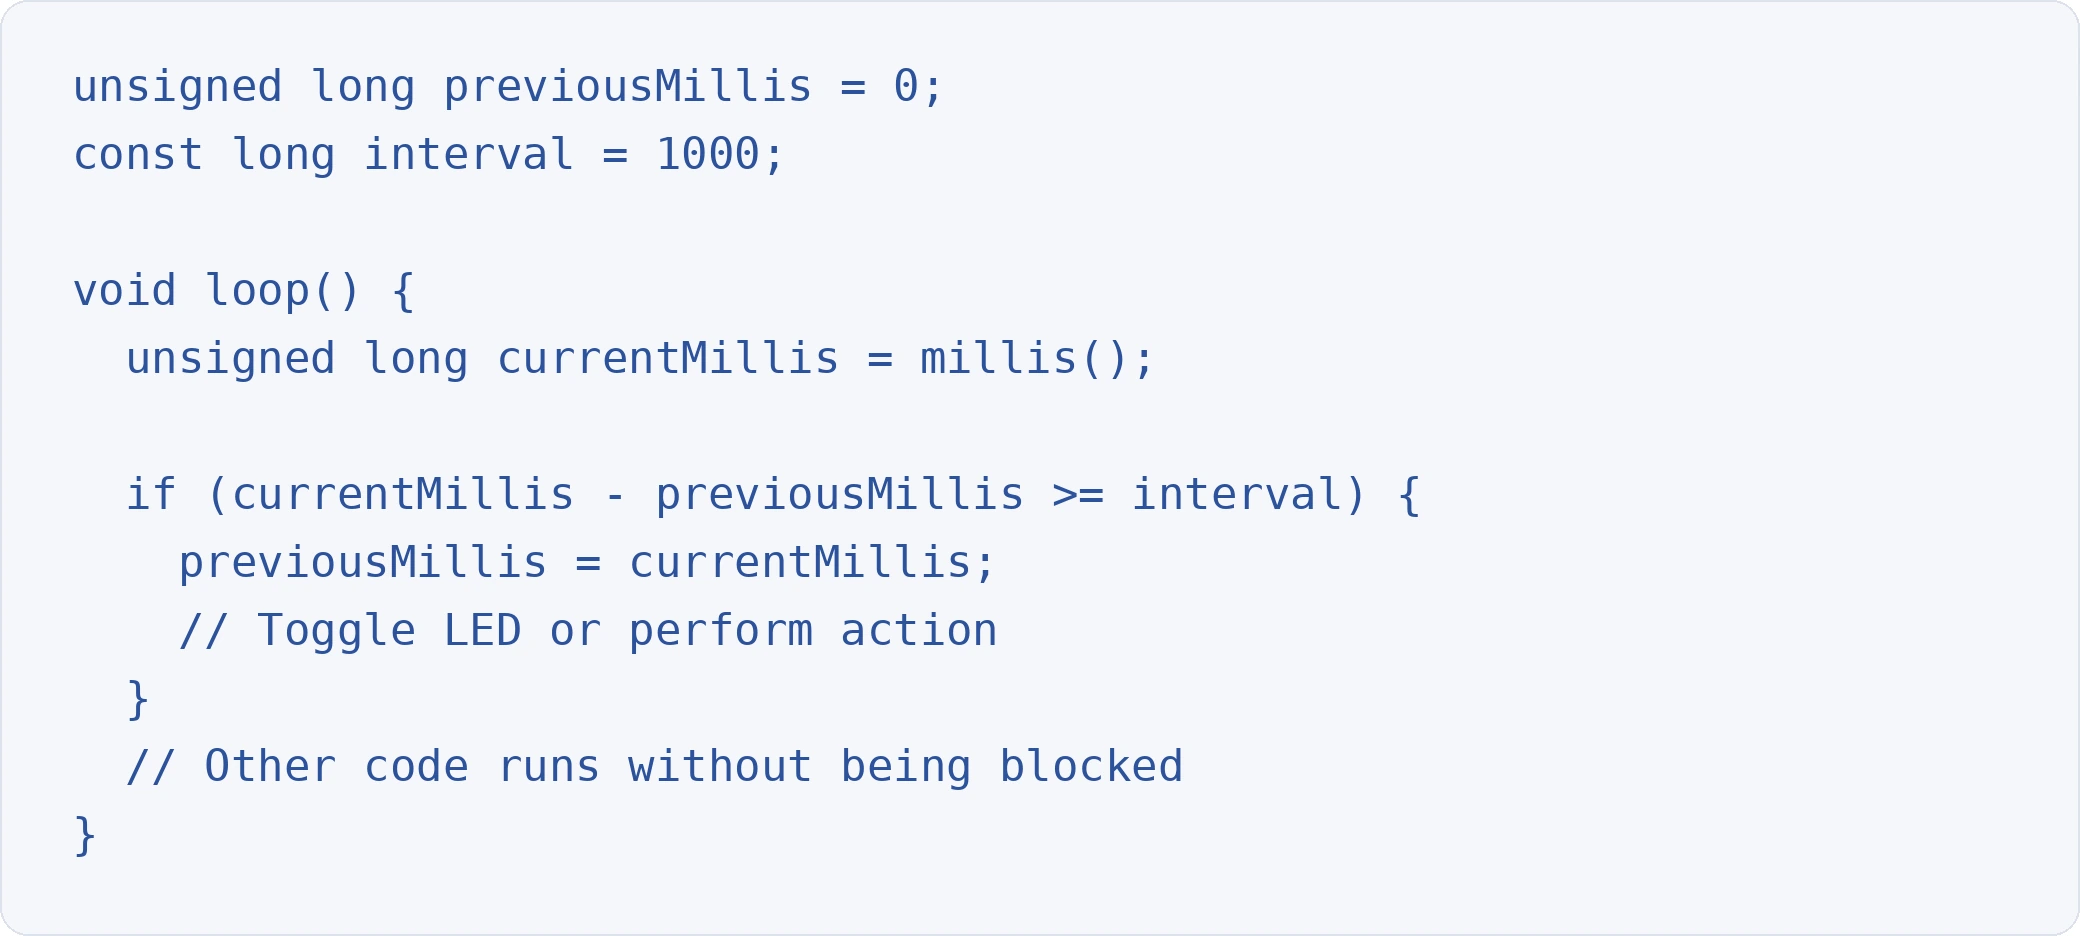
This pattern becomes essential as your projects grow in complexity.
Next Steps in Arduino Programming
Once you are comfortable with the basics, here are productive directions to explore:
- Sensors: connect temperature, motion, distance, and light sensors to build responsive projects.
- Displays: add OLED or LCD screens to show data without a computer.
- Motors and actuators: control DC motors, stepper motors, and servos for robotics.
- IoT connectivity: use Wi-Fi or Bluetooth-enabled boards to send data to the cloud with Arduino Cloud.
- Communication protocols: learn I2C, SPI, and UART to connect multiple devices.
The C/C++ programming skills you build with Arduino are directly applicable to embedded systems engineering, IoT development, and robotics. These are skills that companies actively evaluate when building candidate pipelines for technical roles.
If you want to sharpen your C/C++ fundamentals further, practising on HackerEarth's technical assessment platform offers structured challenges across multiple programming languages.
Frequently Asked Questions
What programming language does Arduino use?
Arduino uses a language based on C/C++. Sketches are written in a simplified version of C/C++ with built-in functions (like digitalWrite() and analogRead()) that make hardware interaction straightforward. Any valid C or C++ code works in Arduino.
How do you program an Arduino board?
You write code (called a sketch) in the Arduino IDE, connect your board via USB, select the correct board and port, then click the upload button. The IDE compiles your code and transfers it to the board, where it runs immediately.
Can you program Arduino with Python?
Not directly through the standard Arduino IDE. However, MicroPython and CircuitPython run on certain Arduino-compatible boards (like the Nano 33 BLE). For most beginners, starting with the default C/C++ environment is recommended because of broader community support and documentation.
How do you stop an Arduino program?
An Arduino sketch runs continuously by design. To stop execution, you can add an infinite empty loop (while(true) {}), press the reset button on the board, or disconnect power. There is no built-in "stop" command equivalent to exiting a desktop application.
What is the difference between setup() and loop()?
setup() runs exactly once when the board powers on or resets. Use it for initialisation (setting pin modes, starting serial communication). loop() runs repeatedly after setup() finishes and contains your main program logic.
Is Arduino good for beginners?
Yes. Arduino is widely considered the most accessible entry point for learning hardware programming. The IDE is free, the boards are inexpensive, the community is massive, and thousands of tutorials cover every skill level from absolute beginner to advanced.